How to grant mandates for managing your affairs
You can grant mandates independently if you:
- are an adult
- have an identification token for electronic services.
Persons placed under guardianship can also grant mandates with certain exceptions. Read more about the restrictions on persons placed under guardianship.
If independent authorisation is not possible, see the instructions on the Granting mandates if you are unable to use electronic services page.
Identify yourself with your personal identification tokens
Identify yourself into Suomi.fi e-AuthorizationsOpens in a new window. using online banking codes, a mobile certificate, a certificate card or the Finnish Authenticator application.
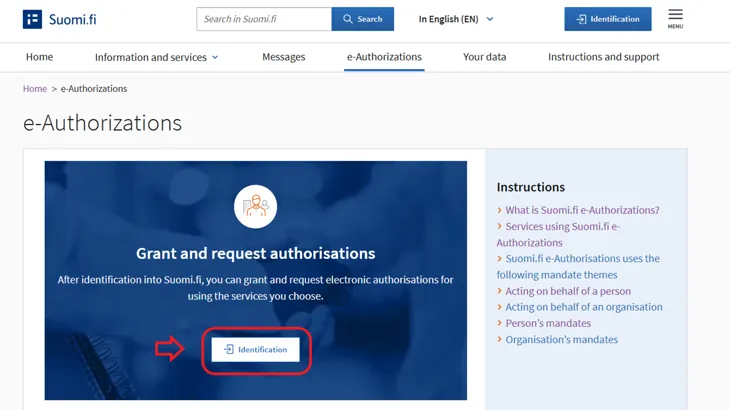
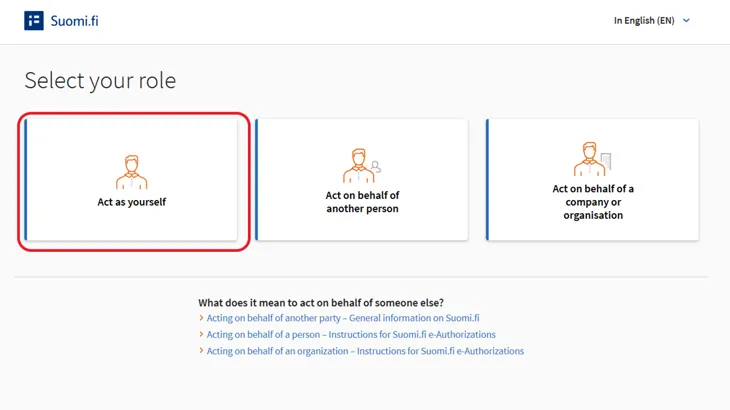
Select "Act as yourself" as your role.
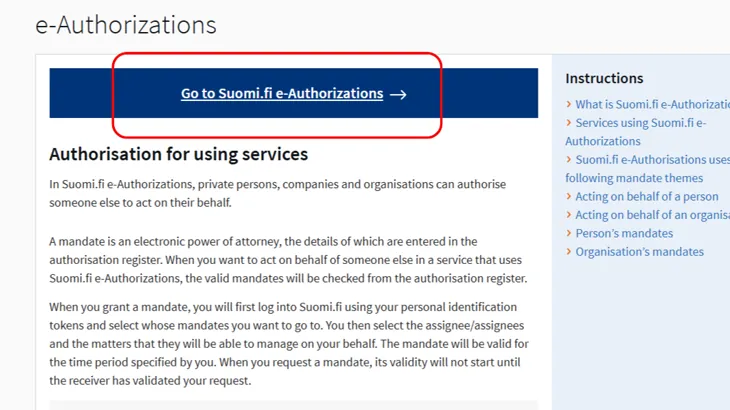
Click the Go to Suomi.fi e-Authorizations button.
Press the Grant or request mandates button. Select Grant mandates.

Four steps to granting a mandate
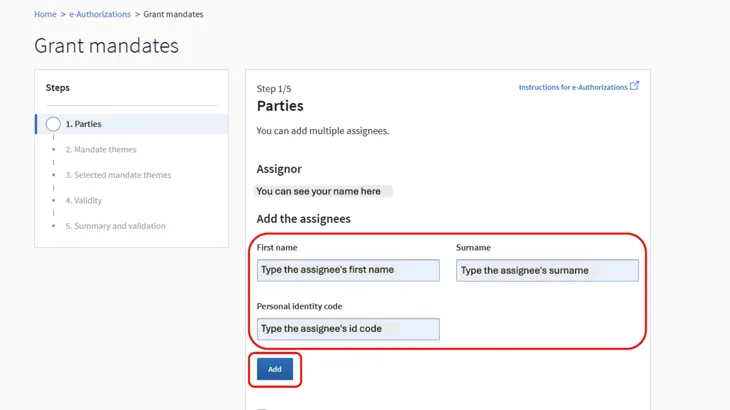
Step 1: Select the parties
On the Parties page, you can see your personal details and select who to grant a mandate.
When you grant a mandate, you act as an assignor. Your information will be automatically retrieved from the Population Information System.
When you grant a mandate
- to a person, who has a Finnish personal identity code, you will need their last name, first name or preferred first name and personal identity code.
- to a company or organisation registered in Finland, you will need the name or business ID of the company or organisation.
The person being granted the mandate may not be under 18.
Step 2: Select the mandate themes
Familiarise yourself with the mandate themes before granting mandates.
On the mandate theme page, search for mandate themes
- using search terms based on the name or description (such as pharmacy services, healthcare or car)
- by the name or the web address of the e-service or organisation (such as Kela, My Kanta or kanta.fi).
You can expand the search by using more than one search term when adding them one by one. The list shows all mandate themes that include any of the search terms.
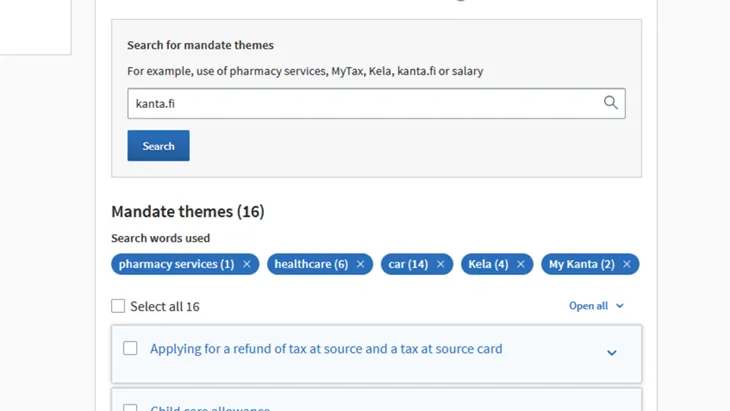
You can select more than one mandate theme. To continue, you must select at least one mandate theme.
If the mandate theme that you have selected includes a limiting specifier, you can limit the scope of the mandate to only apply to an individual property, department of an organisation, or contract. You should only use the specifier after you have received more detailed instructions on the e-service in which the mandate is intended to be used. Specifiers are not compulsory, and you may also grant a mandate without a specifier.
More information on the use of specifier
Step 3: Define the period of validity of the mandate
On the Validity page, enter the start and end dates for the validity of the mandate. The mandate may be valid for a maximum of 25 years from the day on which it was granted.
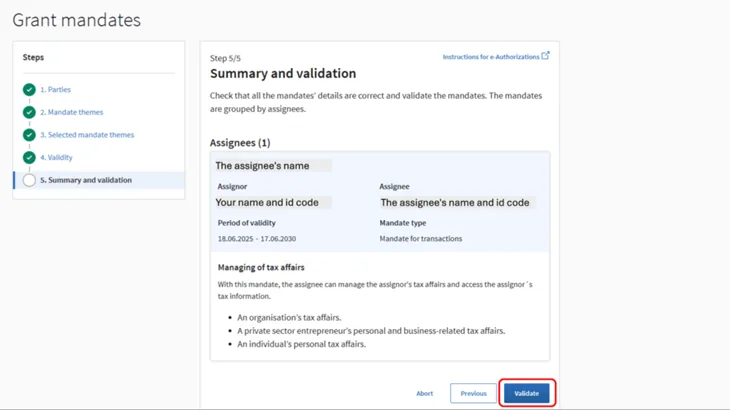
Step 4: Validate the mandate
Finally, on the Summary and validation page, you must check the details of the mandate and confirm it.
You will receive a notification if the validity period of the mandates to be granted overlaps with previously granted mandates or you cannot grant the mandate to the person you have selected. You can delete the overlapping mandates or postpone their start date. The mandates that you cannot grant to the person you have selected will be deleted automatically.
Check mandate details:
- You are the assignor.
- The assignee is a person, company or organisation that can act on your behalf.
- The mandate themes you have selected and the period of validity of the mandate are correct.
If you wish to change the details before the mandate is validated, you can go back over these steps.
Once you have verified the information, press the Validate button.
After you confirm a mandate, it will be valid from the start date you have specified.
Let the assignee know about the mandate
Assignees do not need to approve the mandates you grant them in any way. Remember to let the assignee know that you have given them a mandate.